

.png)
CONTENT
Introduction
Have you ever wondered how top event planners keep track of every detail? The secret is using the right event management timeline template.
Event planning is more than just coordinating dates and venues—it's about ensuring every detail aligns to create a seamless experience. Effective planning prevents last-minute chaos, keeps budgets in check, and ensures all stakeholders are on the same page.
This is where event planning timeline templates come into play. These templates act as a roadmap, breaking the entire planning process into manageable steps. By creating one or using pre-made templates, you can stay organized, better meet deadlines, and focus on delivering a successful event.
In this blog, we’ll explore the importance of these templates, their key benefits, and how to create and customize them to fit your unique event needs.
What is an Event Planning Timeline and Template?
An event planning timeline is a detailed schedule that outlines all the tasks and milestones required to plan and execute an event. It serves as a roadmap, guiding planners through each stage of the process, from initial concept to post-event wrap-up, ensuring every detail is managed effectively.
The duration of an event planning timeline can vary significantly, typically ranging from a few weeks to over a year, depending on the event's size and complexity. Small events might require a few weeks or 1 to 2 months of planning, while larger conferences or festivals need several months to a year to prepare adequately.
Event Management Timeline Template
An event management timeline template is a pre-structured tool that helps planners organize and visualize event planning tasks such as venue booking, vendor coordination, and marketing campaigns efficiently. It provides a ready-made framework that can be customized to suit the specific needs of any event, ensuring that all critical details are accounted for and deadlines are met.
Advantages of Using Event Management Timeline Template
Using event planning timeline templates can significantly streamline the planning process, ensuring everything runs smoothly from start to finish. Here are the key benefits:
- Helps in meeting deadlines: Ensure timely booking of venues, catering, and other critical services.
- Facilitates budget management: Keep track of expenses and stay within budget.
- Coordinates multiple groups and requirements: Streamlines communication and task assignments across teams.
- Enhances collaboration: Improve coordination and ensure everyone is on the same page.
- Incorporates necessary changes: Easily adjust timelines when unexpected changes arise.
- Mitigates potential problems: Identify and address issues before they escalate.
- Improves organization: Keep all tasks and milestones clearly outlined and accessible.
- Saves time: Use pre-structured templates to avoid starting from scratch.
- Increases efficiency: Focus on execution rather than planning logistics.
- Provides clarity: Ensure everyone involved understands the timeline and their responsibilities.
How to Create an Event Planning Timeline
Building a comprehensive event planning timeline is the foundation for a successful event. It helps you visualize the entire process and ensures that all critical tasks are completed on time. Here’s how to create one:
- Identify the scope and purpose: Start by understanding the event’s goals, target audience, and desired outcomes. This will guide every decision you make.
- Determine the timeline: Establish the overall timeframe for planning, considering the event date and any critical deadlines leading up to it.
- Create a list of tasks: Break down the planning process into manageable tasks, from initial planning to post-event follow-up. Think of everything from booking venues to sending out thank-you notes.
- Engage event tech experts: Consult with experts like fielddrive at the beginning of your planning process. This allows you to integrate their technology seamlessly, understand their data workflows, and ensure their solutions are aligned with your event’s needs.
- Assign tasks to team members: Delegate responsibilities to ensure everyone knows what to do and when. This ensures that tasks don’t slip through the cracks.
- Map out the key events: Identify crucial milestones, such as booking deadlines, promotional launches, and final rehearsals. These are the pillars of your timeline.
- Set deadlines and milestones: Establish specific dates for each task and milestone, ensuring everything is completed logically.
- Prioritize tasks: Focus on the most critical tasks first, such as securing a venue, to keep your event planning on track.
Creating a Timeline Template
To create an effective timeline template, start by organizing the above steps in a clear, logical order. Use tools like Excel, Google Sheets, or specialized project management software to lay out your timeline.
Design the template with flexibility in mind, allowing for adjustments as your event planning evolves. This template can then be reused and customized for future events, saving time and ensuring that every event is planned with the same level of detail and precision.

Tips for Customizing Your Event Management Timeline Template
Once you’ve created your event management timeline template, it’s essential to customize it to fit the unique needs of your event. These tips will help you tailor your template for maximum effectiveness:
- Color-code tasks: Use different colors to represent various stakeholders or types of tasks for easy identification.
- Assign responsibility: Clearly mention who is responsible for each task to ensure accountability.
- Add detailed notes: Include any additional information or special instructions for specific tasks.
- Keep it simple: Choose a format that is easy to read and understand at a glance.
- Start early: Customize your timeline template as soon as possible to allow ample time for adjustments.
- Set realistic deadlines: Ensure that deadlines are achievable to keep the planning process stress-free.
- Include all stakeholders: Make sure everyone involved in the event has input and access to the timeline.
- Regularly update: Continuously revise the timeline to reflect any changes or new information.
Tools for Creating Event Management Timeline Templates
The right tools can make all the difference in creating an effective event management timeline. Here are some popular options to consider:
- Microsoft Excel: A versatile tool for creating detailed timelines with customizable templates. Excel’s grid format allows for easy organization of tasks and deadlines.
- Google Sheets: Similar to Excel but with cloud-based accessibility, allowing for real-time collaboration with your team.
- Smartsheet: A powerful project management tool that offers pre-built templates and advanced features for complex event planning.
- GanttPRO: Specialized in creating Gantt charts, this tool helps visualize timelines and track progress effectively.
- Canva: Known for its design capabilities, Canva offers visually appealing templates that can be customized for your event planning needs.
Types of Event Management Timeline Templates
Selecting the right timeline template is essential to organize your event planning effectively. Each type offers a different approach to visualizing and managing tasks, tailored to your event’s specific needs:
- Gantt Chart Template: A visual timeline that displays tasks over time, perfect for tracking progress and deadlines in a clear, linear format.
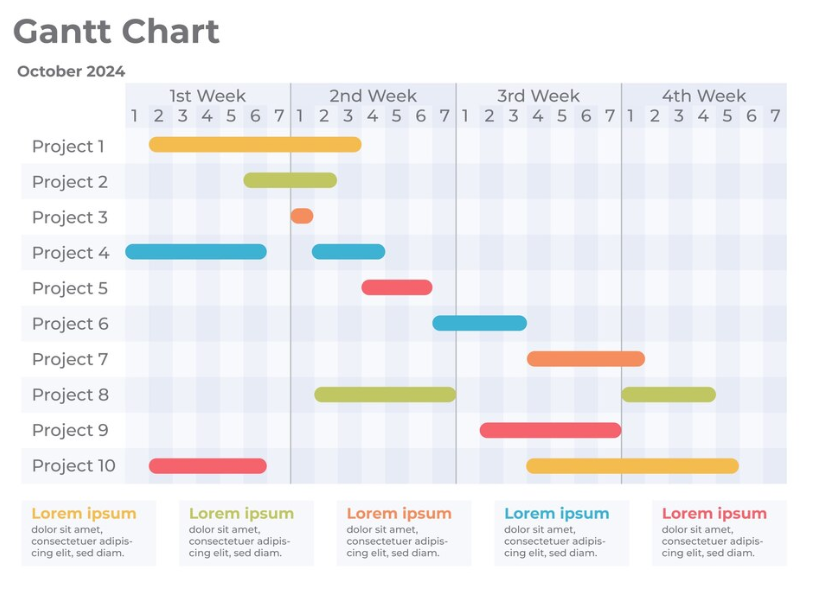
Source: Freepik
- Checklist Template: A simple list of tasks that need to be completed, ideal for smaller events or when you need a quick overview.
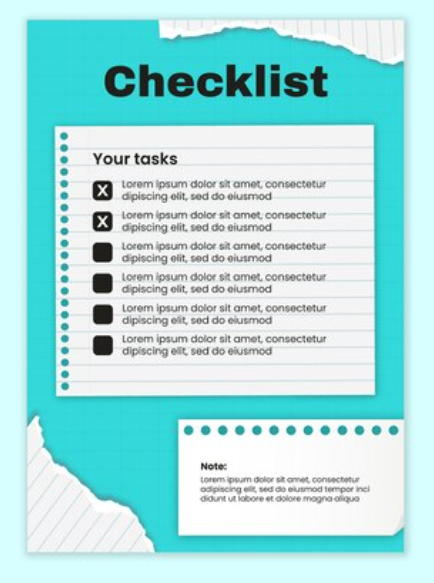
Source: Freepik
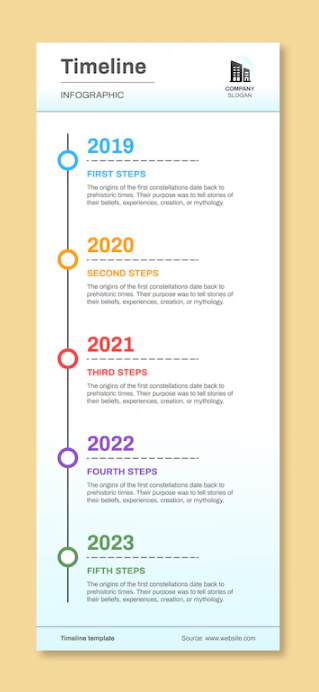
- Vertical Timeline Template: A linear timeline that runs from top to bottom, allowing you to see tasks and milestones in a vertical flow, which can be easier to follow for some projects.
Source: Freepik
- Mind Map: A creative, non-linear approach to planning, where tasks are connected in a web-like structure, allowing for a more flexible view of how different elements of your event relate to one another.

Source: Freepik
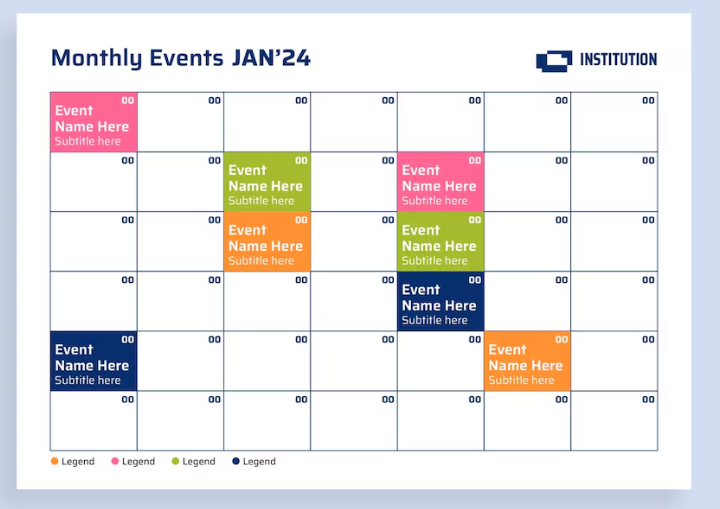
- Calendar Template: A monthly or weekly view of tasks, ideal for events with many date-specific deadlines and appointments.
Source: Freepik
Now, if you want to start quickly and avoid creating a timeline from scratch, we've got you covered.
Free Event Management Timeline Templates
Keeping everything on track can feel daunting when it comes to event planning. That's why we've compiled a collection of free event management timeline templates to take the stress out of your planning process.
Wedding Timeline Template
Organizing a wedding can feel overwhelming, but with our Wedding Timeline Template, you can manage all the details, from booking the venue to sending out thank-you notes, in a structured and stress-free way.

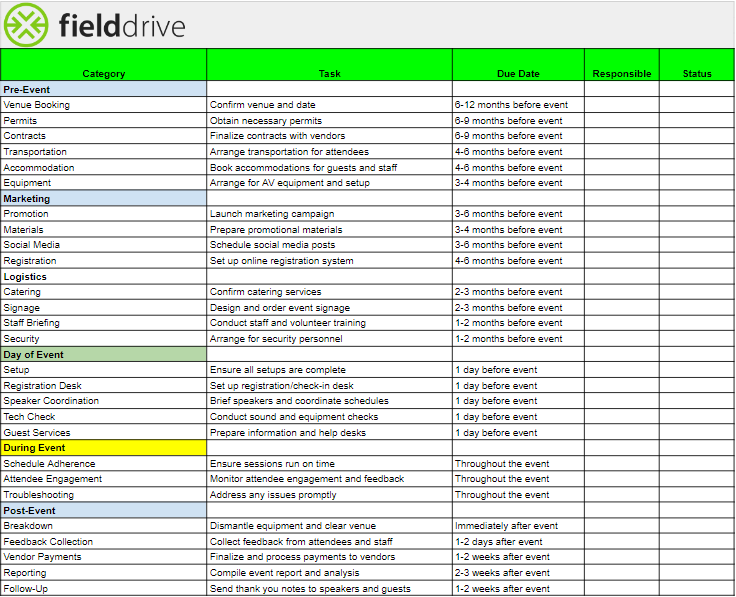
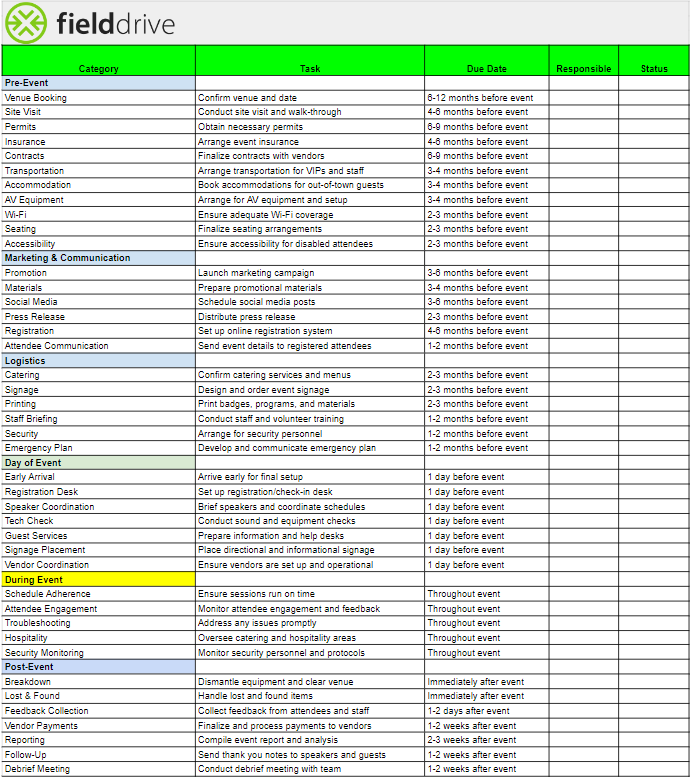
Onsite Event Checklist Timeline Template
This Onsite Event checklist powered by fielddrive is designed to guide event organizers through each stage of the event planning and execution process. It is divided into several key categories, each addressing different aspects of event management, so your event goes off without a hitch.
Timeline Template 1:
Timeline Template 2:
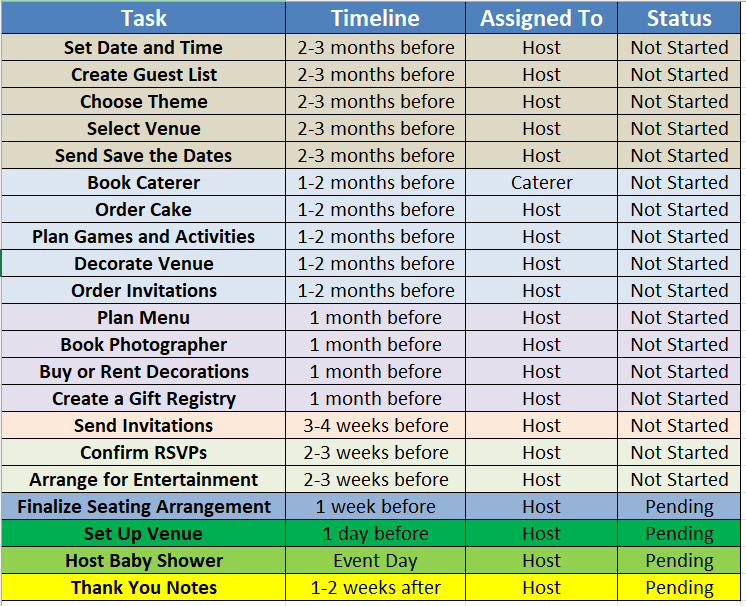
Baby Shower Timeline Template
Celebrate the upcoming arrival with ease using our Baby Shower Timeline Template. It covers all the essentials, from sending out invites to planning games and helping to organize a joyful event.
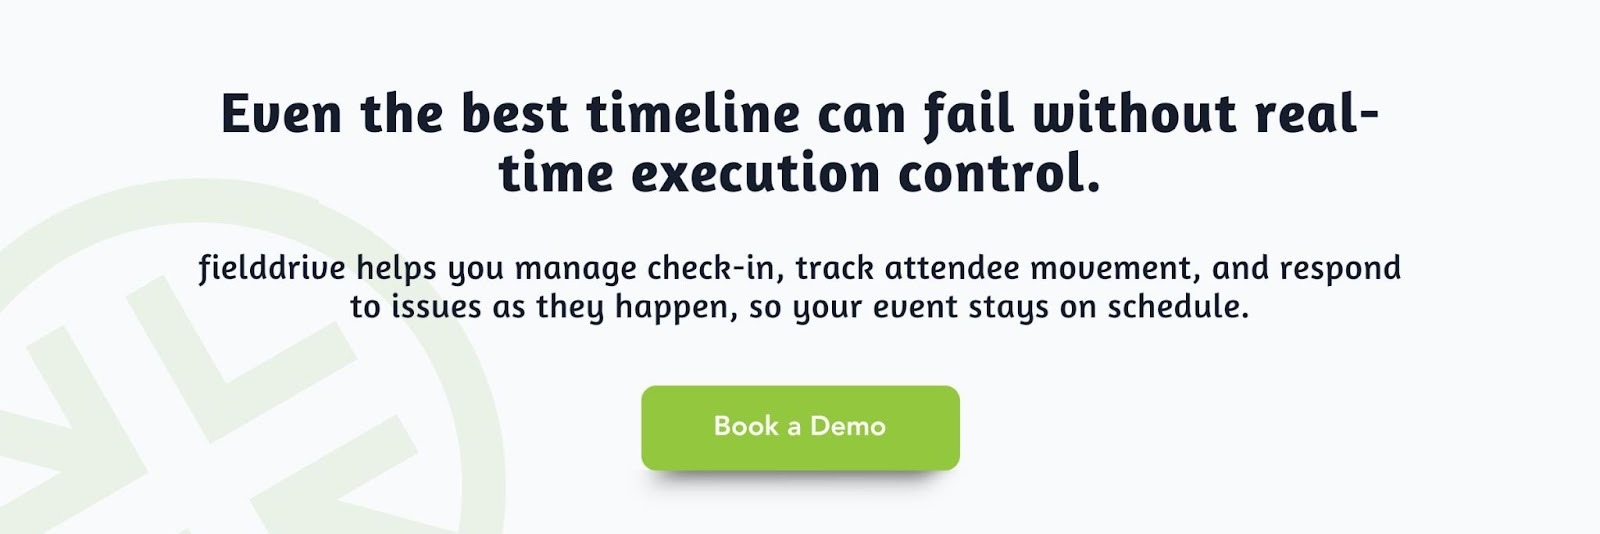
Achieve Event Success with fielddrive
Starting your event planning with the right event management partner, like fielddrive, ensures a streamlined process from the outset. fielddrive specializes in on-site event solutions, including check-in systems, badge printing, lead retrieval, and facial recognition, which integrate seamlessly into your event's workflow and significantly enhance the attendee experience, from the moment they arrive until the event concludes.
fielddrive offers several key features to ensure your event's success:
- Efficient Check-in Kiosks: Streamline the entry process with fast check-in kiosks that reduce wait times and improve the attendee experience.
- On-Demand Badge Printing: Provide personalized, full-color badges instantly, enhancing the professionalism and organization of your event.
- Facial Recognition Technology: Speed up check-ins with secure, smile-activated facial recognition, ensuring a seamless and hassle-free experience for attendees.
- Sustainable Badges: Opt for eco-friendly, biodegradable badge options that align with sustainable event practices, reducing environmental impact.
- Lead Retrieval App: Empower your exhibitors with a powerful lead retrieval app, enabling them to capture and manage attendee information effectively, maximizing their event ROI.
- Real-Time Data Analytics: Gain valuable insights into attendee behavior and event performance, allowing you to make informed decisions throughout the event.
By incorporating fielddrive's innovative solutions into your event planning, you can ensure a smooth, efficient, and memorable experience for all participants. Reach out to fielddrive early in your planning process to maximize these benefits and elevate your event to the next level.
Conclusion
Planning an event can be a complex and overwhelming process, but with the right tools, you can ensure that everything runs smoothly. Our free event management timeline templates are created to assist you in staying organized, efficiently managing tasks, and ensuring a successful event, no matter the size or type.
When it comes to elevating your event, fielddrive is your go-to partner. From seamless check-ins with their advanced kiosks to on-demand badge printing and real-time data analytics, fielddrive ensures that your event meets and exceeds expectations. By integrating fielddrive’s innovative solutions into your planning process, you’ll enhance the attendee experience, streamline operations, and make data-driven decisions that lead to event success.
Transform your next event into a memorable experience with fielddrive. Book a free demo today!
.svg)
.svg)
.svg)
Want to learn how fielddrive can help you elevate your events?
Book a call with our experts today

.svg)